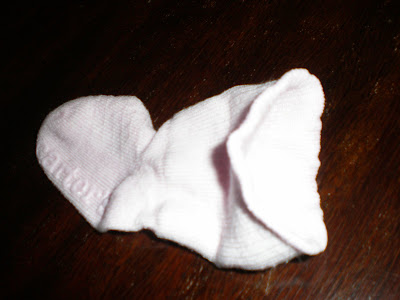
Step 1: Buy socks. Wash/dry socks.

Step 2: Stretch end of sock where you want the ribbon ruffle to end up. Measure to figure out how much ribbon you will need. Just guesstimate. It is roughly twice the size of the un-stretched sock.

Step 3: Cut ribbon to size, adding an extra 1/2 inch for a seam.

Step 4: Use Frey Check or clear nail polish on ends of ribbon. Allow to dry.
If you need baby socks or grosgrain ribbon, here are some deals that I found...
Step 5: Sew ribbon ends together to form a loop.


Step 6: Turn sock inside out. Before I turned it inside out I marked with a pin the direction and side that I wanted the ribbon to be attached. But this was just to help me remember- if you have a better mind you will not need to do this.

Step 7: Pin seamed end of ribbon to back of sock. Then pinch ribbon to sort of figure out where the other 3 quadrants are and pin them as well to the sock. Again, just use your best judgment. This is not an exact science. Or it isn't when I sew them anyway.

Step 8: This is the hardest part of this entire process. Ready? OK! (I totally said that in my head like an old-school '80's cheerleader) You need to stretch the tiny sock and sew at the same time. I figured that you need to stretch from pin a to pin b and so on as you are sewing. I used a zig zag stitch to allow for more stretch/give after it is sewn. The trickiest part is just keeping the sock stretched out while sewing on the ribbon. Which is less tricky and more just a reminder to go slowly.


Minus the time it takes for the Frey Check to dry, this whole process only takes a few minutes. Easy peasy! And the perfect addition to any little girl gift!

Let me know if you use this tutorial and share photos.
Happy sewing!!


22 comments:
Thanks! Can't wait to make a few pairs.
When I took my ribbon flower making course, she had us use a soldering iron to cut the ribbons. It also melded the edges so they didn't fray. Just a thought and would save the drying.
Happy Birthday!! Hope you have a wonderful day!
Thanks for the tutorial!!!
I'm saving this for future use, when I get my new sewing machine!!!
Happy Birthday!!!
Happy Birthday to you!!!!
Very cute. :)
Happy Birthday and many happy returns!
Happy Birthday, these are so cute, my 2yr old niece would love them.
I am embaressed to tell you that overwhelmed me! I have no sewing skills whatsoever, but they look great!
OMG!! That is so cute! I love it.
Happy Happy Birthday!
Ummmmm... you had to use a sewing machine... that took talent!
They are adorable!! You're so sweet for showing the tutorial!
I do not sew ,but I love these socks!Is there any way to make them using a hot glue gun?(i can actually use one of those)lol
I am new to your site, but I love this project! I made them this morning and they were just as you said: Easy peasy! Thanks for putting up easy directions for a project I was dying to do.
I make these socks also, but sometimes they tend to flip up a little when I sew them. Any suggestions? I tried a little longer cut of lace. But they still flip up Help
I found this page through a google search! I am wanting to make these for m y 3 girls! THANK YOU SO MUCH!
i am going to go out and buy some socks tomorrow!! great and east tute!
It is really easy to end fraying, especially on grosgrain. You just take a lighter (I use the long handled one for candles) and run the end of your ribbon right over it for a few seconds. It singes the ends and NO fraying.
so cute! I have a bajillion little socks that my son has outgrown that I wanted to pass onto my niece, but they are just plain boy socks. I'll have to transform a few pair and hand them down! Thanks for the great tutorial-ette!
Ruffle socks for my girlies have been on my crafty-to-do list for a while now - yours look great! ;) I'm curious, how does the ribbon look after washing/drying? Best, M*
Very Cute! Makes me kinda want little one around again.
You should come link this up to my Making It With Allie party.
Alliemakes.blogspot.com
How cute and simple! Wish I had a baby to make these for =) Please come by and show this off at my VIP party today =) http://designergarden.blogspot.com/2011/07/vip-party-21.html
These are just too adorable! Would love it if you came by and linked up to my Manic Monday Linky Party!
-Melissa
http://serendipityandspice.blogspot.com
Post a Comment